安装必要的依赖(一键)
sudo apt-get install openssl libssl-dev \
libpcre3 libpcre3-dev \
zlib1g-dev \
libxml2 libxml2-dev libxslt-dev \
libgd-dev \
libgeoip1 libgeoip-dev
安装必要的依赖(分步)
安装openssl
sudo apt-get install openssl libssl-dev安装pcre
apt-get install libpcre3 libpcre3-dev安装zlib
apt-get install zlib1g-dev安装xml2、xlst
apt-get install libxml2 libxml2-dev libxslt-dev安装libgd
apt-get install libgd-dev安装geoip
apt-get install libgeoip1 libgeoip-dev编译安装
下载Tengine-2.4.0源码到服务器并解压,切换到configure文件所在目录下
./configure --with-debug \
--with-pcre-jit \
--with-http_ssl_module \
--with-http_stub_status_module \
--with-http_realip_module \
--with-http_auth_request_module \
--with-http_v2_module \
--with-http_dav_module \
--with-http_slice_module \
--with-threads \
--with-http_addition_module \
--with-http_geoip_module \
--with-http_gunzip_module \
--with-http_gzip_static_module \
--with-http_image_filter_module \
--with-http_sub_module \
--with-http_xslt_module \
--with-stream \
--with-stream_ssl_module \
--with-mail \
--with-mail_ssl_module \
--with-stream_ssl_preread_module
也可以去除一些不需要的模块,或者让其中的一些模块动态地加载
./configure --with-debug \
--with-pcre-jit \
--with-http_ssl_module \
--with-http_stub_status_module \
--with-http_realip_module \
--with-http_auth_request_module \
--with-http_v2_module \
--with-http_dav_module \
--with-http_slice_module \
--with-threads \
--with-http_addition_module \
--with-http_geoip_module=dynamic \
--with-http_gunzip_module \
--with-http_gzip_static_module \
--with-http_image_filter_module=dynamic \
--with-http_sub_module \
--with-http_xslt_module=dynamic \
--with-stream=dynamic \
--with-stream_ssl_module \
--with-mail=dynamic \
--with-mail_ssl_module
编译安装,若系统中没有安装gcc,这里需要先安装gcc。
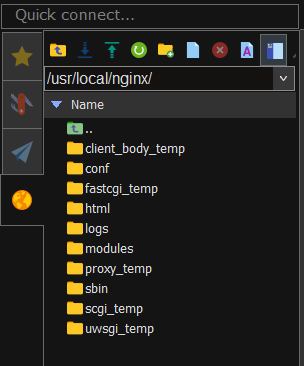
make && make install和Nginx一样,会被默认安装在/usr/local/nginx/目录下

查看版本、插件等信息
/usr/local/nginx/sbin/nginx -V直接输入nginx -V可能会有如下提示
root@VM-16-8-ubuntu:/home/tengine-2.4.0# nginx -V
-bash: /usr/sbin/nginx: No such file or directory
此时可创建如下软连接
ln -s /usr/local/nginx/sbin/nginx /usr/sbin/nginx之后即可正常使用
配置文件
为方便管理,在/usr/local/nginx/conf/目录下创建conf.d和 modules-enabled文件夹,并把/usr/local/nginx/conf/nginx.conf中的内容替换为如下内容,主要是http中的include conf.d/*.conf;和最外层的include modules-enabled/*.conf;
user  root;
worker_processes  auto;

#error_log  logs/error.log;
#error_log  logs/error.log  notice;
#error_log  logs/error.log  info;
#error_log  "pipe:rollback logs/error_log interval=1d baknum=7 maxsize=2G";

#pid        logs/nginx.pid;

include modules-enabled/*.conf;

events {
    worker_connections  1024;
}

http {
    include       mime.types;
    default_type  application/octet-stream;

    #log_format  main  '$remote_addr - $remote_user [$time_local] "$request" '
    #                  '$status $body_bytes_sent "$http_referer" '
    #                  '"$http_user_agent" "$http_x_forwarded_for"';

    #access_log  logs/access.log  main;
    #access_log  "pipe:rollback logs/access_log interval=1d baknum=7 maxsize=2G"  main;

    sendfile        on;
    #tcp_nopush     on;

    #keepalive_timeout  0;
    keepalive_timeout  65;

    #gzip  on;

    include conf.d/*.conf;

}
添加Systemd守护进程
控制台执行vim /usr/lib/systemd/system/nginx.service并写入以下内容
[Unit]

Description=nginx service

After=network.target

[Service]

Type=forking

ExecStart=/usr/local/nginx/sbin/nginx

ExecReload=/usr/local/nginx/sbin/nginx -s reload

ExecStop=/usr/local/nginx/sbin/nginx -s quit

PrivateTmp=true

[Install]

WantedBy=multi-user.target输入:wq保存,之后配置开启自启动
systemctl enable nginx启动Tengine(Nginx)服务
service nginx start查看服务状态
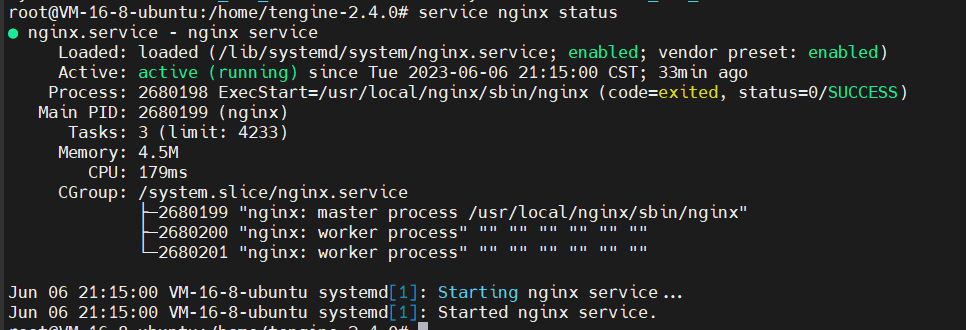
service nginx status[进阶] 隐藏error page的服务器信息
以return 403时为例,默认的页面如下图所示,会显示服务器的一些信息

要隐藏这些信息,需要修改nginx.conf配置,在http{}中加入下列参数即可
server_tag off;
server_info off;
server_tokens off;之后执行nginx -s reload生效配置,效果如下图所示

附录
完整的nginx.conf
user  root;
worker_processes  auto;

#error_log  logs/error.log;
#error_log  logs/error.log  notice;
#error_log  logs/error.log  info;
#error_log  "pipe:rollback logs/error_log interval=1d baknum=7 maxsize=2G";

#pid        logs/nginx.pid;

include modules-enabled/*.conf;

events {
    worker_connections  1024;
}

http {
    include       mime.types;
    default_type  application/octet-stream;

    server_tag off;
    server_info off;
    server_tokens off;

    #log_format  main  '$remote_addr - $remote_user [$time_local] "$request" '
    #                  '$status $body_bytes_sent "$http_referer" '
    #                  '"$http_user_agent" "$http_x_forwarded_for"';

    #access_log  logs/access.log  main;
    #access_log  "pipe:rollback logs/access_log interval=1d baknum=7 maxsize=2G"  main;

    sendfile        on;
    #tcp_nopush     on;

    #keepalive_timeout  0;
    keepalive_timeout  65;

    #gzip  on;

    include conf.d/*.conf;

}


